Monday, December 23, 2019

How to Unclog Drains

Do you notice water backing up from the toilet or the sink? If you constantly hear gurgling sounds when using bathroom fixtures, it may be a sign that you have a drainage problem. Here are the best solutions you could try:
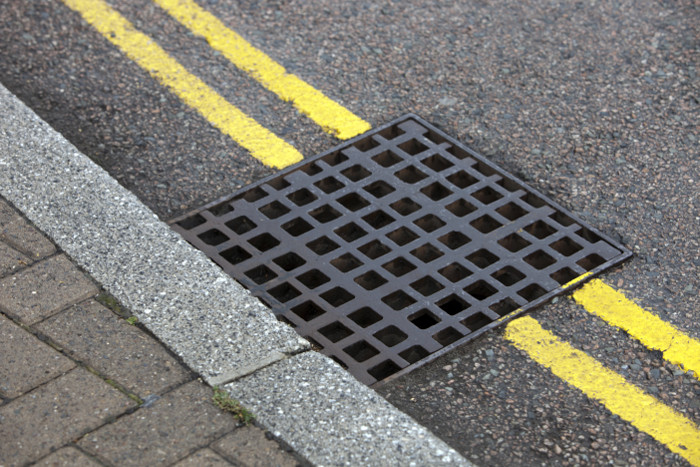
Pour in Some Bacteria
Whether it’s hair, grease or food, some sort of organic matter causes most drain clogs. Fortunately, there’s a type of bacteria that breaks down organic matter in your drains. Add the bacteria to your drains and it will consume organic matter which helps prevent clogs. You can buy drain-cleaning bacteria in granular or liquid form.

Bacterial drain cleaner is noncorrosive so it won’t harm pipes, and the bacteria won’t interfere with the bacteria in your septic system. Follow the instructions on the package. Add the bacteria when drains won’t be used, like right before everybody goes to bed, to allow it time to work. Drain and trap cleaner is available at home centers and hardware stores. A package should last several months, depending on how many drains you treat. Source: FamilyHandyman

Use a Hose or Power Washer
You may need more force to clear an especially stubborn main drain clog, and you should apply it through one of the drain cleanout fittings. You should have one or two of these in the basement and more outside. Open one of them by unscrewing the cap with a wrench and have a bucket handy to catch water. You’ll also want to wear protective clothing, goggles and gloves because the water may be under pressure and could spray when you open the cleanout.

If water does spill out, you’re on the right track because it means the clog is downstream of the fitting. Insert a hose with a high-pressure nozzle or preferably a power-washer wand with a 0° (red) or 15° (green) tip. Place the bucket under the cleanout, point the nozzle downstream, pull the trigger and stand back. Source: Hunker

Get Help from Professionals
Don’t run the water or flush the toilet! If you don’t add water to your drain system, you can’t make the problem worse (that is, if the clog is in your line and not the city’s main; see below). As an added precaution, you can shut off the main water supply to the house so that no one runs the water by accident. Tell everyone in the house not to use water, then call a plumber or drain specialist to have the drain cleared. These professionals have special equipment, including motorized augers, to quickly and effectively remove large clogs in the main sewer drains. Source: TheSpruce

Don’t wait for your drainage problem to get worse during the holiday season when everyone will be at home. Call us to book an appointment today!


Contact:
Kerrisdale Roofing & Drains
8296 Ross St, Vancouver, BC V5X 4C6
(604) 360-2114


from Kerrisdale RD https://ift.tt/34X36ul
Wednesday, December 18, 2019

Safety Roofing Tips Every DIYer Should Know

Planning to repair the roof on your own to save some money? Here are useful tips you should remember before starting your weekend project.


Check the weather
Fussing to try and find a leak as soon as it happens is something that could put you in the hospital. Meddling on a roof while it’s raining or covered with ice and snow isn’t the ideal way to find a leak. Trying to temporarily fix a leak could be highly dangerous. If you want to do it right, there is no quick-fix. Just take your time, and be very patient and careful to wait for Mother Nature to give you the green light. Source: DIYNetwork

Get a gutter guard
One way to keep your ladder safe and steady and to keep your gutters protected as you’re up on the roof is to use a gutter-guard. The gutter-guard basically consists of any scrap piece of wood or plywood that you fasten to the roof deck, put a notch in it, lean the ladder legs against the notch and tie in place. You can also put some shingle bundles against the feet of the ladder to help keep it steady and make sure it doesn’t slide.

Create a toe hold
This tip is also particularly good if you’re working on a steeply pitched roof. In order to help keep your balance and prevent slippage, you can install your own temporary toe holds to help your feet keep their grip. Simply take several wood cleats measuring 2 by 4 inches (you can also use adjustable roof jacks for this) and nail them to the roof deck. When you’re done with your work, simply remove them. Source: DoItYourself

Find someone to help you
Let someone else know when you’ll be up on the roof – someone who will be with you at home that day, or else a neighbor who can keep an eye on you. In fact, it’s best if at least two people work together on even a minor roof job. Someone needs to be there to help or call for help in the case of an emergency. Source: YourAmazingPlaces

If you’re unsure how to handle roof repairs, it’s better to leave it to the professionals. Our roofing crew have the right safety gear to guarantee that no accidents will happen.  Book an appointment today!


Contact:
Kerrisdale Roofing & Drains
8296 Ross St, Vancouver, BC V5X 4C6
(604) 360-2114


from Kerrisdale RD https://ift.tt/2M9keWR

Monday, December 9, 2019

3 Important Chimney Safety Tips You Should Keep in Mind

Imagine this: you’re trying to stay warm by hanging in front of the crackling fire with a cup of your favorite drink, hand-knitted blanket wrapped around you. All of a sudden, fire broke! Way to ruin the moment, right? Prioritize safety and have peace of mind by following these tips:

Avoid creosote buildup
Creosote is a chemical mass of carbon formed when wood, tar or fossil fuels are burned. Creosote can linger in chimneys and you would have no idea from the outside. When creosote is not removed, can become a thick coating of debris in the flue and chimney. Most chimney fires start in the smoke chamber/smoke shelf area so it’s important to clean those areas. Creosote ignites at 451 degrees Fahrenheit and once it starts burning, it expands like foam sealant and can build to more than 2,000 degrees Fahrenheit in less than a minute. Source: FamilyHandyman

Don’t remove ashes right away
Fireplace coals can remain hot enough to start a fire for up to three days, so always wait at least that long before removing the ashes. At that point, close the damper to prevent cold air in the flue from stirring up excess dust while you’re removing the ashes. Be sure to wear a dust mask and open a window in the same room as the fireplace to prevent negative air pressure. Use a shovel to scoop the ashes into a metal container. Store the container far from combustible materials and surfaces and wood floors. Source: HGTV

Install a safety screen
Keep a fireplace screen in front of the fireplace when in use. A fireplace screen should be at least 3 feet (0.91 m) high, and most common models are be made of fine, crossed wire on a flexible, three-part frame. This screen will catch any live sparks that leap out of the fire, and will also prevent larger logs from falling out.[6]

A screen is a necessity if you have small children or animals in the house, as they could easily run or stumble into an open fire. If there are more durable models of fireplace grate available at your local hardware store, it may be wise to purchase a heavy grate in addition to (or instead of) a lighter screen. Source: WikiHow

Let us take a look at your home’s chimney to see whether there are damages that need repair. Book an appointment today!


Contact:
Kerrisdale Roofing & Drains
8296 Ross St, Vancouver, BC V5X 4C6
(604) 360-2114


from Kerrisdale RD https://ift.tt/2Yv0VMS

Wednesday, December 4, 2019

Preparing your strata for an exterior painting project

Decision making can be a challenge in any strata corporation; especially when investing significant funds into maintenance such as an exterior re-painting project. Here is some friendly advice to get started and provide your council with a solid foundation for your planning.

Establish a Scope of Work

A proper scope of work means determining what needs to be painted and what does not. Having clear consensus from council before calling contractors will save time and money. There are painting inspectors who can help you decide what to re-paint and which products to use (search online for Painting Inspectors in your area or call us for info on who we see in the market). If your strata decides to establish the scope of work on your own, the first step is to review your existing surfaces and note any areas of concern. Use the following checklist to help ensure you cover all the areas.

One way we’ve found helpful to assess a property is to print out an overhead from Google Maps. Then during a comprehensive 1- 2 hour walk around the property, make notes on the sheet about the affected areas.
Walk-through Checklist

Here is a list of common surface types to consider for re-painting and possible repair:

  • wood siding
  • composite siding
  • vinyl siding
  • stucco
  • concrete
  • brick
  • soffits
  • fascia & trim
  • wood windows
  • decks/patios
  • railings
  • metal surfaces
  • light standards
  • pillars
  • shakes
  • doors/frames
  • garage doors
  • metal Cladding
  • privacy fencing
  • perimeter fencing
  • decorative features
  • other

Other considerations are:

  • existing leaks
  • balcony membranes
  • window perimeters
  • sealant repairs
  • wood trims
  • metal flashings
  • attachments
  • roof membrane


Prepare a budget and plan to raise funds

It is always best practice to start planning early and give yourselves ample time to make your decisions. In some cases, this means 1-2 years before the project, in other cases 6 months can be enough time.

If you’ve taken the time to get council consensus on the scope of work, then getting a budget quote will be fairly simple.  It will also be more useful because it will be an accurate amount to use for planning and approval. Remdal often provides budget quotations for projects.If you need assistance with a budget quote, we have estimators available to help you.

And now that you have a better idea of the amount of money required, your focus can turn to raising funds though your Contingency Reserve fund (3/4 vote), Special Levy (3/4 vote) or from a Depreciation Report (majority vote). This is a choice that varies from one strata to another depending on many factors.

Next steps

Over the following months you will want to give your project the best opportunity for success, but taking some additional steps including:

  • building a strong business case for owners;
  • assessing and choosing your colours;
  • inviting qualified painting contractors;
  • evaluating and selecting the best proposal;
  • identifying best practices to help the job go smoothly;
  • the science of finishing well.

We’ll cover these items in upcoming blogs.

Looking for assistance with a project, a second opinion, or a budget quote? Contact us here:


The post Preparing your strata for an exterior painting project appeared first on Remdal.


from Remdal https://ift.tt/2PiFREW

Tuesday, December 3, 2019

Pros and Cons of Copper Gutters

Gutters are a vital part of the house. They keep water away from your house’s roof, siding, and even basement, thus avoiding structural damage and flooding. There are many different types of material you can choose from, but today, we’ll be focusing on copper. Weigh its pros and cons below:

PROS
Longer life-span
Copper is more durable than many other materials. Most copper gutters last 100 years or more. After a while, the metal produces a greenish layer called verdigris, which is often used as an industrial fungicide that helps the gutter last longer since roots won’t set in to cause damage. Verdigris is what gives the Statue of Liberty its distinctive color.

Visual appeal
Copper has a reputation as a beautiful material that lends charm and elegance to any structure. It fits especially well on older buildings, matching the materials and styles used. It also helps a home stand out among others in the neighborhood, adding curb appeal.

Structurally sound
Because of copper’s durability, items manufactured with copper are structurally sound. For example, most rain gutters require joints so that when the material expands and contracts in fluctuating temperatures, no cracks form. Copper, however, doesn’t require these joints. The whole gutter can be installed as one piece, which makes it stronger. Source: Nearsay

CONS
Expensive
The single biggest con of choosing copper gutters for any house is the price. With prices reaching nearly $25 per linear foot for just the gutters alone, it is easy to see why copper gutters have not taken off in popularity yet. Source: Improvenet

Difficult to install
It’s inadvisable to install the copper guttering yourself. Why? Because cuts or adjustments to joints may be necessary in order to complete the process. And you might not have specialist tools or expertise to get the job done properly. Source: Medium

Want to install copper gutter on your home? We’ll be more than happy to help. Call us for a free estimate!


Contact:
Kerrisdale Roofing & Drains
8296 Ross St, Vancouver, BC V5X 4C6
(604) 360-2114


from Kerrisdale RD https://ift.tt/2YcGq7z