
Buying a backpacking or camping tent is a big investment, but you can extend your tent's lifetime and get many years of use from it by spending a little time on tent maintenance, repair, and cleaning. While there are many types and styles of tents, the techniques and tools required to keep them in top shape are basically the same.
Here are the tips and tricks I've learned over the years to prolong the useful lifetime of a backpacking tent, tarps, tents, and bivy sacks. I've also included links to companies that sell replacement tent poles, parts, and repair products that I've found helpful to maintain, repair, and clean my tents, tarps, and other backpacking and camping shelters.
Tent Cleaning and Maintenance
1. How to clean and dry a tent
The best time to start caring for a tent is immediately after a trip, by drying and cleaning it before packing it away for storage. Separate the components and hang them up to dry out completely. It can take several days for all the cords and threads in your tent to dry completely, so be patient.
a. Rain fly and inner tent
Hang tents indoors or in total shade, since the UV radiation in direct sunlight will degrade the fabric if left out for a sustained period of time. Don't try to wash a tent in a washing machine or dry them in a clothes drier….or they're likely to be shredded or melt.
Once dry, clean out any debris, such as sand or leaves from the inner tent where they have a tendency to collect. A simple shake is sometimes all it takes, although a portable hand-vacuum can also be quite convenient to use.
b. Tent poles
Inspect your tent poles, especially the ends called ferrules, which hold the pole segments together, for any cracks, and then air-dry the poles. Cracks form when you let the end of the poles snap together and occur quite commonly, especially on ultralight tents that have thin poles. The only long-term way to fix them is to replace the ferrule, cracked pole segment, or the entire pole.
If you do find a crack or chip in a ferrule, it's a good idea to order a replacement segment so that the pole does not fail on your next trip. Fibraplex and Tentpole Technologies stocks fiberglass, aluminum, and carbon fiber tent poles and segments for many popular tents and are good suppliers of replacement parts. You can also contact your tent's manufacturers to inquire about their cost for parts or replacement poles.
c. Tent stakes (pegs)
Count your tent stakes to make sure you have the same number you left on your trip with, and replace any that are missing or bent beyond recognition. (You never want to step on a stake with your foot to drive it into the ground, that's why they bend. Instead pound them into the ground with a rock or simply push them in with your hands.) Remove any dirt that's accumulated in the stakes' grooves or adhered to them, to prevent abrasion of the bag or sack you carry them in.
d. Zippers
Zippers are probably the most fragile piece of a tent and the hardest to replace if you don't have sewing skills. The best way to avoid replacing one is to keep the ones on your tent clean and free of dust and grit. To do this, wipe your tent zippers down with a dry cloth after each trip. If your zipper still looks dirty or contains grit, gently brush it with a dry toothbrush to dislodge any remaining foreign matter.
If your zipper is totally busted, you can buy a replacement kit and try to repair it that way, although it will require sewing skills. Most tent manufacturers will repair tents for a fee or refer you to Rainy Pass Repairs, which is an excellent gear repair shop.
2. How to wash a tent
If your tent is muddy or dirty, you should start by trying to gently scrubbing it with water and a soft sponge, but no soap. This is usually sufficient. Avoid scouring brushes which can remove the waterproof coatings on the outside of the tent.
If your tent is stained or smells bad, wash it gently in a tub of water with a mild detergent like unscented Woolite and then rinse it throughly, before air drying. For stubborn stains, use a synthetic wash cloth to gently scrub the tent material. Avoid harsher detergents or more abrasive sponges because they can strip the protective coatings off your tent.

3. How to remove mildew from a tent
Mildew looks like white, green, or black dots on the surface of the tent fabric and may also have a musty odor. The best way to get rid of it is to gently wash your tent in a tub of water with Gear-Aid Mirazyme. If you do nothing to treat mildew, it will eventually digest the fabric it's growing on and ruin it. As mildew spreads, it can also leave a stain which can be difficult to remove.
4. How to store a tent
When you tent is clean and dry, fold it up and store it in a cool dry place to prevent any mildew from forming on it. Pack all the components together to make it them easy to find for your next trip.
Don't store your tent set up or in direct sunlight because the tent poles can also lose their tension (if curved), if they're left set up for a long period of time. UV damage from direct sunlight can also weaken the tent's fabric and coating and make it more prone to tears.
Tent Repairs
1. How to repair a rip or hole in a tent floor or wall
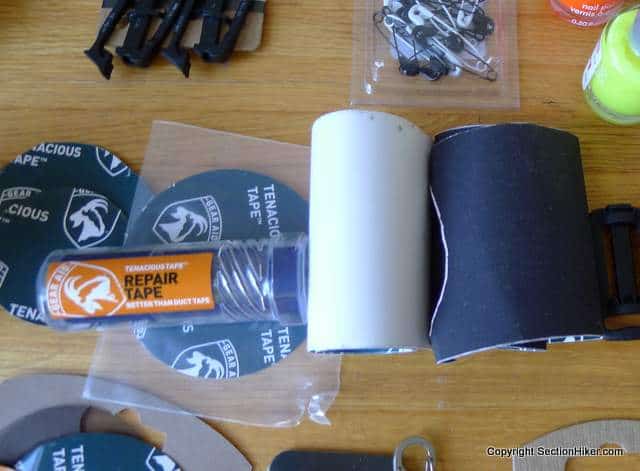
The easiest way to repair a rip or hole in a tent floor or wall is to repair it using Tenacious Tape, a super sticky tape with a fabric side that is great for repairing tents, rain jackets, inflatable sleeping pads and other outdoor fabrics. It is available in pre-cut patches or in larger rolls that you can cut to suit your needs. I've used it to repair quite large rips in tent walls and ceilings and it's never leaked, no matter how many times the tent is folded or stuffed afterwards.
To use it, clean the area surrounding the hole or rip with water or rubbing alcohol to remove any dirt or oils. Next, bring the fabric edges together and apply a Tenacious Tape patch to the hole, extending 1″ or 2″ beyond its edge. If you cut a piece of tape from a larger roll, round the edges with a scissor to help prevent catching a corner. Then apply pressure to the tape with the heel of your hand, warming the glue with your body heat. For big rips or ones in high tension areas like corners, you might want to apply a second patch on the opposite side of the hole for reinforcement.
Many tent manufacturers also include fabric swatches with their tents, that you can sew over holes or rips, and then seam seal the edges to make a waterproof patch. This requires sewing skills and drying time however, which is why I recommend Tenacious Tape instead. It has the same effect, but only takes a few seconds to apply, and basically lasts forever.
How to repair ripped insect netting
If you find holes or rips in the insect netting, you can repair them with MSR adhesive insect netting patches. These patches have an adhesive which sticks well to nylon or polyester mesh. I've tried other mesh repair kits and like these the best because they're very sticky. The mesh is also small enough to repel no-seeums, as well as mosquitos.
How to repair leaking tent seams
Most backpacking and camping tents are now factory seam-taped to make them waterproof. This tape can break down with use and begin to leak or flake off from age. The best way to patch or prevent a leak is to remove or trim away the failed piece of tape and to seam seal the seam. You need to use the right product for your tent type however, depending on the fabric its made with.

Most tents (made with PU covered fabrics) should be seam-sealed with Gear Aid Seam Grip + WP, while ultralight silnylon tents should be seam-sealed with Gear Aid Seam Grip + Sil.
I've been very unimpressed with water-based seams sealers and avoid them.
How to repair flaking polyurethane tent flies and floors
If you own a polyurethane tent and notice that your tent fly is leaking, or your tent floor is flaking or tacky to the touch, you need to apply a new polyurethane coating with Gear Aid Seam Grip TF Tent Fabric Sealant. This can be done on the specific area that's leaking or the entire side of a tent, although it's easier to do smaller sections.
First, you need to remove the old coating, by scrubbing it away with a brush and some rubbing alcohol. Then you simply paint on the seam sealant and let it dry to restore your tent's waterproofing. Alternatively, some tent manufacturers will sell replacement rain flies or inner tents.
How to repair a broken tent pole or ferrule
Most tents come with a short 6″ metal sleeve (also sold separately) that you can slide over a broken segment of tent pole and tape in place as a temporary patch. You can also take a tent stake or wooden stick to a broken pole. Loner term, you will want to replace the pole or the broken segment.
See Also:
- Backpacking Gear Repair Hacks
- How to Seam Seal a Tent or Tarp
- Tenacious Tape for Hiking Gear Repair
- Illustrated Tent Terminology Guide
The post Tent Repair, Maintenance, and Cleaning Guide appeared first on Section Hikers Backpacking Blog.
from Section Hikers Backpacking Blog https://ift.tt/2OWw21e
No comments:
Post a Comment