
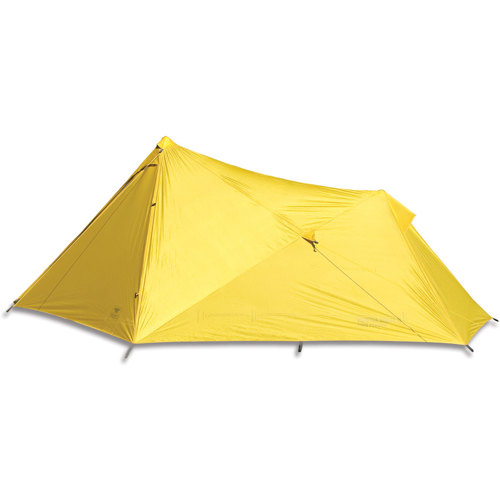
The Mountainsmith Mountain Shelter LT is a two-person floorless tarp shelter that requires two trekking poles to set up. Weighing 29.5 ounces, it's not the lightest weight two person tarp you can get by a long shot, but it is inexpensive, spacious, and durable, making it ideal for trips where you want a lot of covered storage. For example, this is the kind of lightweight shelter you might bring if you were bunking with another dad or mom on a Scout 50-miler, backcountry fishing with a buddy, or out hunting for elk with your (big) dog.
Specs at a Glance
- Weight: 29.5 oz, minus stakes
- Type: 2 Person, 3-season
- Minimum number of stakes to pitch: 6, and up to 13 for more interior volume and stability
- Doors: 1, front
- Seam-taped: Yes
- Materials: 40d Sil-Nylon Rip Stop PU 2000MM
- Dimensions:
- 142″ x 54″ x 84″ (360 x 137 x 213 cm)
- Area: 54 ft² / 5 m²
- Peak: 4′ 6″
The Mountain Shelter LT is a shaped tarp that can only be pitched one way. It has a diamond-shaped floor plan, with one front door that forms a huge front vestibule for gear storage. Each side of the door can be rolled back and secured independently, or both can be rolled back to create more of an A-frame front opening. There's also another smaller storage area at the rear of the tarp, so you can really spread out.

Setup is relatively straightforward, but practice does help to get it down. There is a diagram lightly stenciled to the side of the tarp, which illustrates how long the front and rear poles should be to pitch the tarp, so you can never lose the directions. Just match up your trekking poles to the diagram, with 53″ for the front pole and 40″ for the rear. The diagram is very handy if your poles only have centimeter measurements and not ones in inches.

Next, stake out the three guyout points at the rear of the tarp (the back part of the diamond) loosely with a lot of slack and insert the rear pole. Re-adjust the stakes with the pole standing and repeat at the head end of the tarp.

This will create a pitch that is flush with the ground without a lot of ventilation underneath. Unfortunately, the ground level guy-outs on the tarp are short webbing loops, without much vertical length to enable better airflow. This becomes an issue if its raining and you can't keep the front door open, because internal condensation will collect on the walls and potentially drip onto your gear. While there is a rear peak vent on the shelter, it's small enough to be insignificant. Your best bet might be to retreat as far back into the 142″ long shelter as possible, and leave the front vestibule completely or half-open. As long as the rain isn't blowing into the front of the shelter, you should stay dry.

While it only requires 6 stakes to pitch the Mountain Shelter, I'd recommend using the 5 additional side wall and peak guylines which help increase the interior volume and livability inside the shelter. While you can carry stakes to anchor these, the guylines are long enough to anchor to tree branches on the ground or rocks with a tautline hitch if you want to shed some stake weight.
There are five additional guylines, in total, including
- 2 sidewall guyline half way up the sides walls to increase interior volume
- 1 rear guyline to help pull the ridgeline taut
- 2 front peak guylines to help anchor the front trekking pole, necessary if you want roll back both sides of the front vestibule.
The Mountain Shelter LT requires a big level space to set up, but it also provides impressive livability for a single wall shelter. There's plenty of space inside and you can easily sit up inside, nice if you bring a chair kit along to use with an inflatable sleeping pad. You can even enter or leave the Mountain Shelter in a crouch, since the peak height of the front vestibule is 4′ 6″. In comparison, the peak height of most double wall backpacking tents is nearly half that.

The best way to sleep in the Mountain Shelter is with your head at the head end, making it easier to get in and out at night. The front door has a center zipper and each side of the door can be rolled pack and secured independently. Since the shelter is floorless, you'll probably want to bring along a plastic sheet (I use super lightweight window wrap) to sleep on as a moisture barrier and to prevent any abrasion to your sleeping pad
Recommendation
The Mountainsmith Mountain Shelter LT is a large two-person single-wall tarp shelter that's well made and durable, but easy on the wallet. Weighing 29.5 oz, it requires a fair amount of space to set up, but it'd also quite spacious inside, providing substantially more interior space than most two-person double-wall tents that cost 4 times as much. While you will probably want to bring some sort of lightweight bug and moisture protection, the norm for tarp-style camping, the Mountain Shelter LT is still a great value for the money and is often available on sale.
Compare 4 Prices
-

 Amazon US
 $129.95$91.23View -

 CampSaver.com
 $129.95$97.46View -
 Sunny Sports $129.95View
 -
 Moosejaw $129.95View

The author purchased this product.
SectionHiker.com receives affiliate compensation from retailers that we link to if you make a purchase through them, at no additional cost to you. This helps to keep our content free and pays for our website hosting costs. Thank you for your support.The post Mountainsmith Mountain Shelter LT Review appeared first on Section Hikers Backpacking Blog.
from Section Hikers Backpacking Blog https://ift.tt/2LQYXip
No comments:
Post a Comment